Integrating with Microsoft Exchange through Azure
Introduction
This step-by-step guide will show you the most popular method for creating a Microsoft Exchange application for Re:infer in your Azure Cloud Platform. You'll learn how to create an Application (client) with an ID and Client Secret, and find your existing Directory (tenant) ID. This will allow users to access Exchange mailbox integrations in Re:infer.
Why is a successful integration important?
Failure to create an Exchange-Re:infer application in Azure can lead to permissions errors that prevent users from accessing their mailbox integrations. To gain the full benefits of Communications Mining, follow the steps below and complete the process in its entirety.
The Integration Process—Step by Step
1. Sign into Azure
Sign into your Azure Cloud Portal.
2. Register a new Application for Re:infer
Access the App Registrations menu and select the New Registration option.
Register a new application:
- Enter an application name—for example 'reinfer-exchange-integration'
- Under Supported account types select the single tenant option
- Hit Register to complete the registration
Azure will give you an Application (client) ID and a Directory (tenant) ID. Save these for later and go to Step 4.
3. Create a Client Secret for your Re:infer application
To keep your application secure, you must create a Client Secret to log into your application. First, click on Certificates & Secrets under the Manage sidebar, then follow the steps below:
- Select the Client secrets option if it's not already selected
- Select New client secret
- In the sidebar, add an easily recognizable Description and select an expiry date—we recommend 12 months
- Hit Add
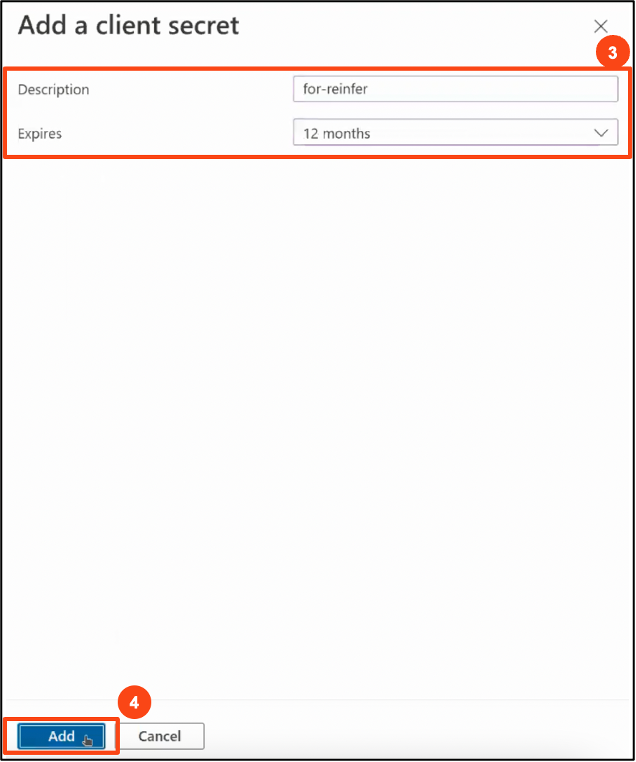
You've now created a Secret Value for your Re:infer application.

Please note that Azure will only display this Secret Value to you once so make sure to copy it. If you ever lose your secret value, simply complete Step 3 again to create a new one.
4. Set API permissions
- Navigate to API permissions under the Manage sidebar
- Select Add a permission
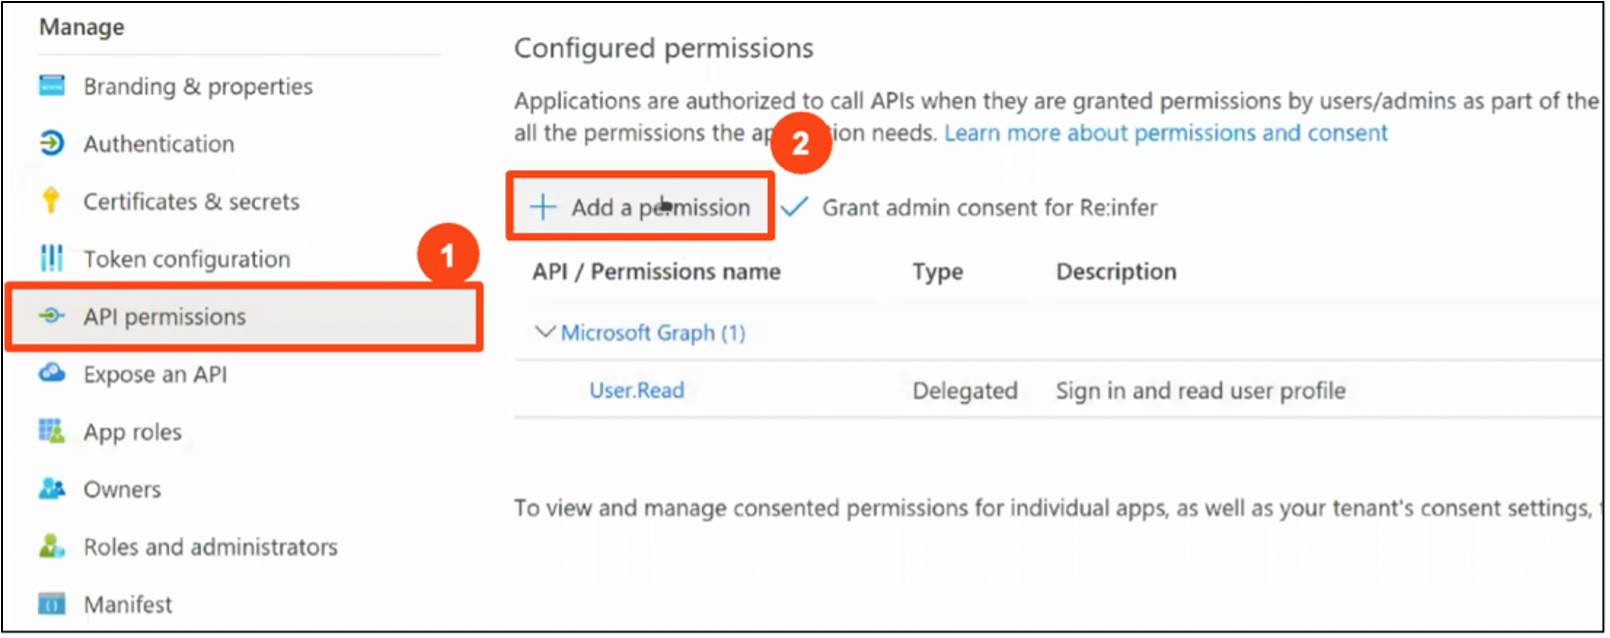
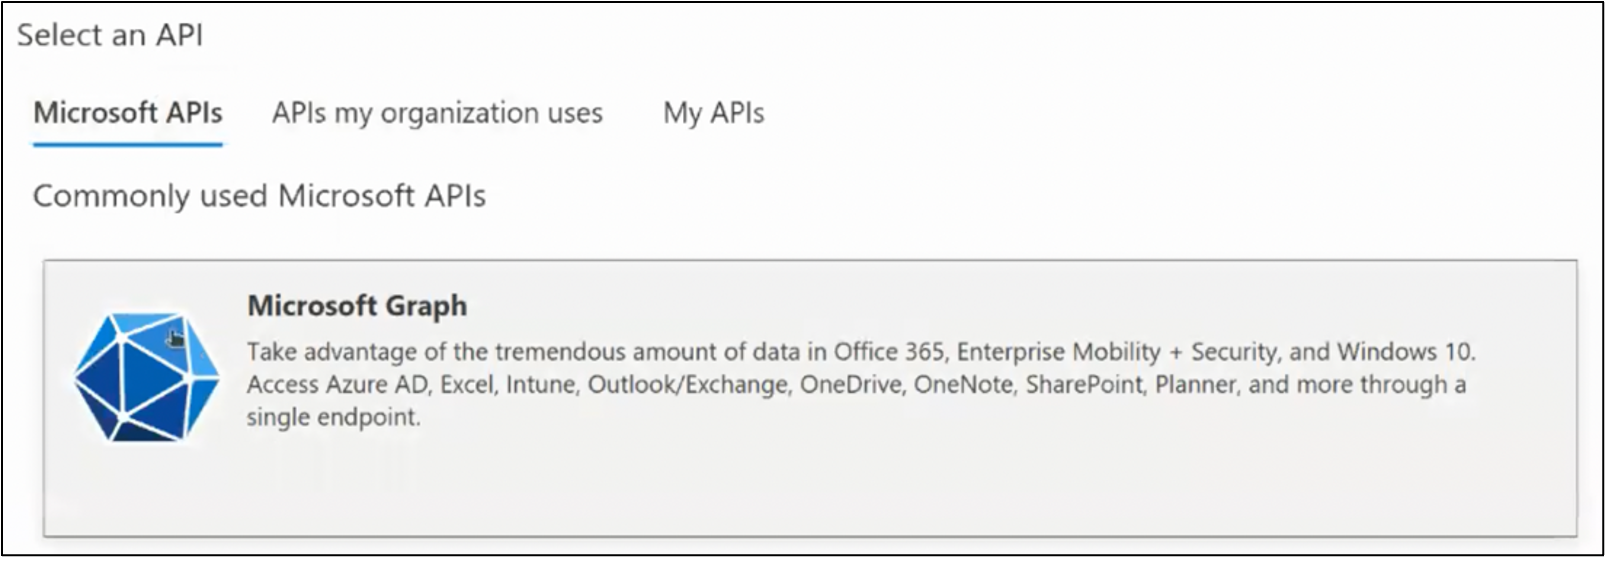
- Select Microsoft APIs and choose the Microsoft Graph option
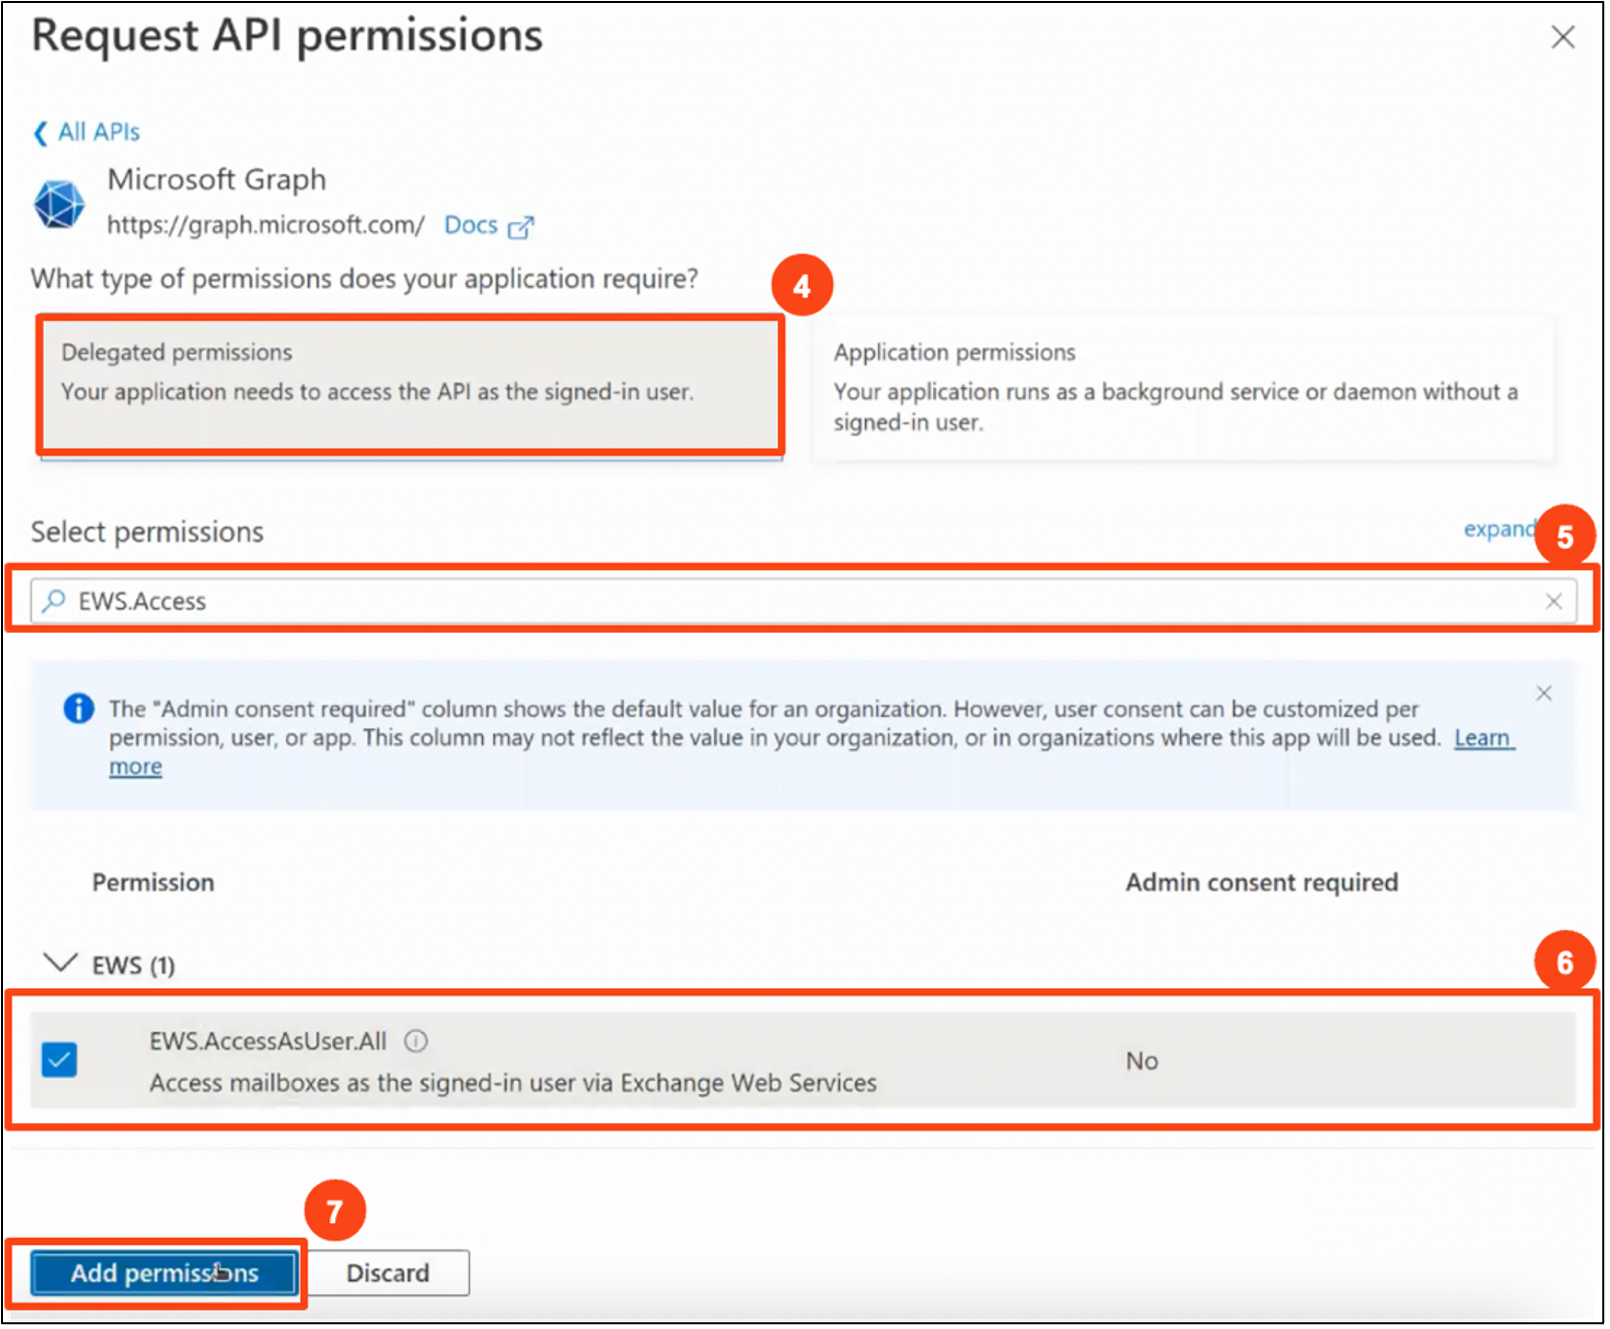
- Choose Delegated permissions
- In the Select permissions textbox, enter 'EWS.Access'
- Expand the EWS permission and check the box for EWS.AccessAsUser.All
- Hit Add permissions
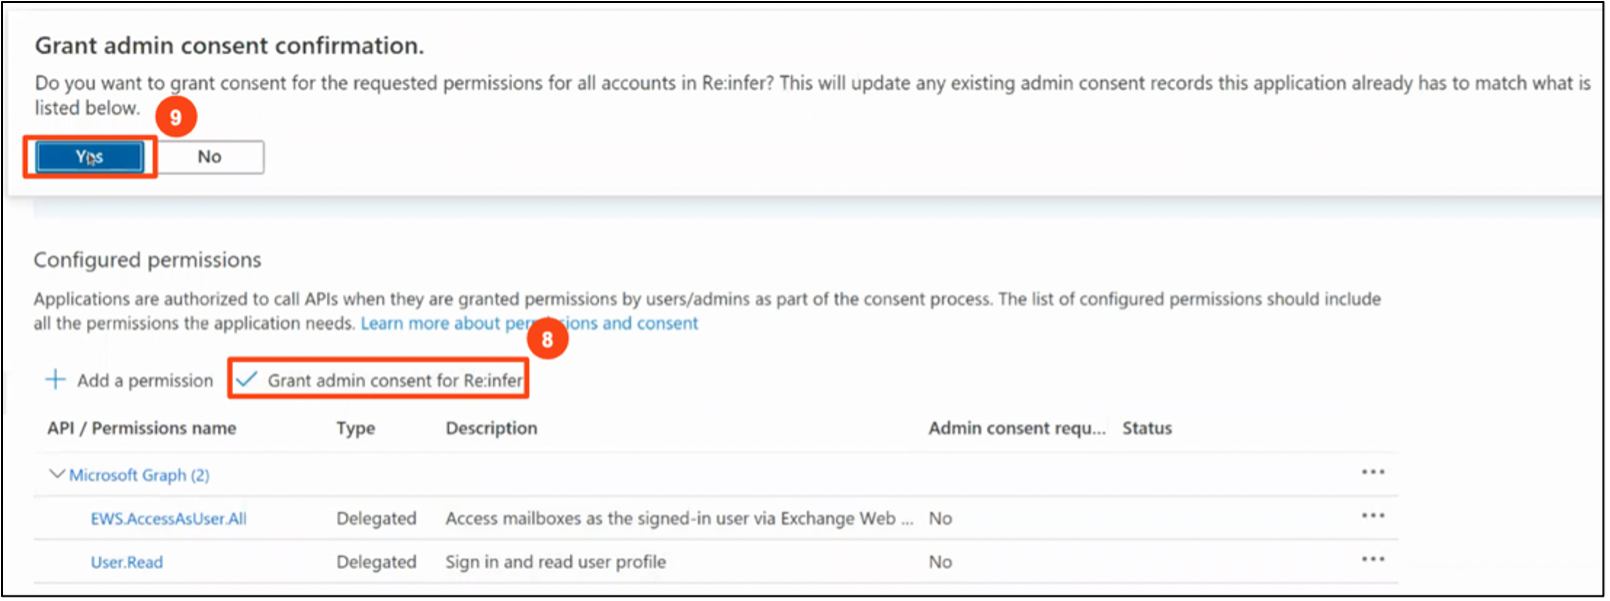
- Back in the API permissions menu, hit Grant admin consent for Re:infer
- Select Yes in the Grant admin consent confirmation pop-up
5. Give the service user access to the shared mailboxes
You will need a service account with access to the mailboxes you wish to connect to Re:infer.
- Create a service account:
- Add user—find out how.
- Assign licenses to the user—find out how.
- Give a service account access to shared mailboxes (it is sufficient to give the service account read-only access). There are two main methods you can use to do this:
- Create shared mailboxes and give access to users (including the service account)—find out how.
- Give the service account access to a user's emails—find out how.
6. Sign into Re:infer
Sign into Re:infer through UiPath Automation Cloud as normal.
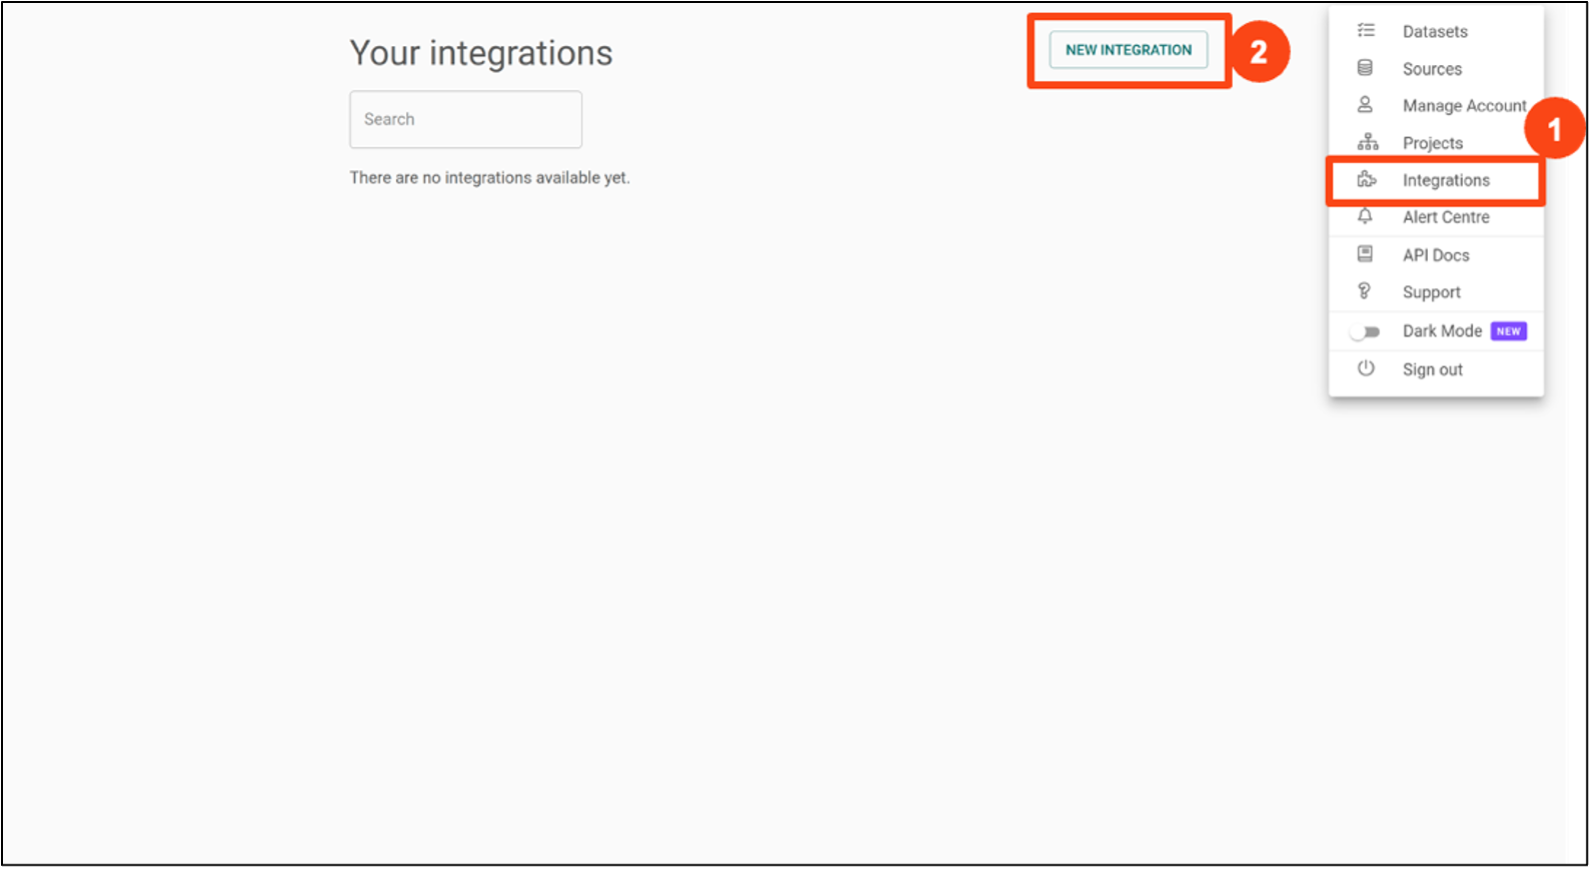
7. Create a new integration in Re:infer
- Navigate to the Integrations page through the dropdown menu
- Select New Integration
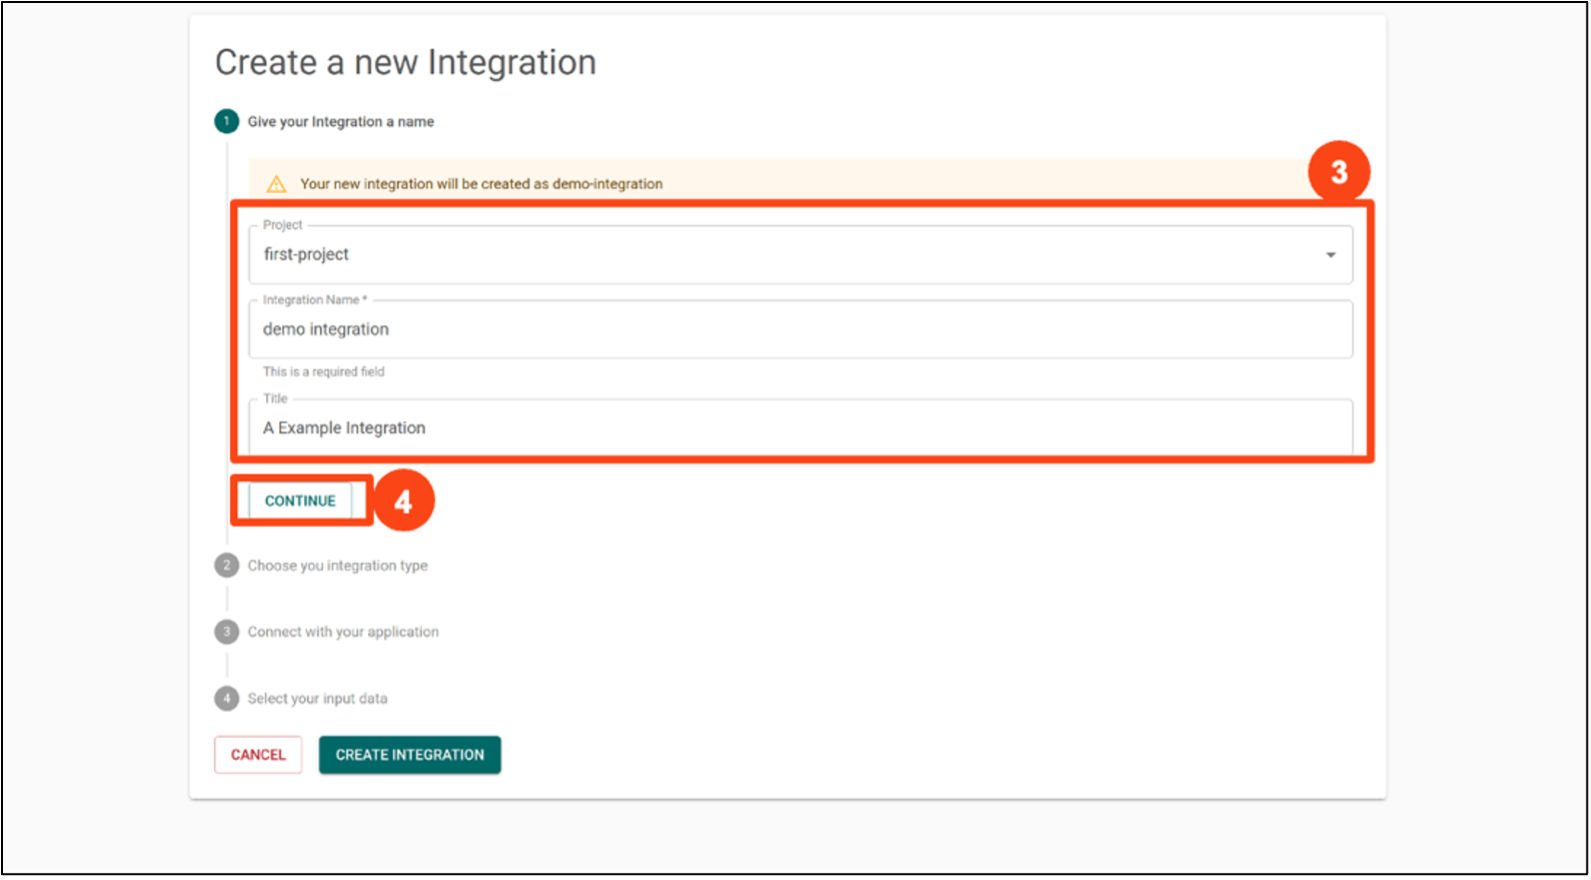
- Select an existing project and enter a name for your integration, and add a title if desired
- Click Continue
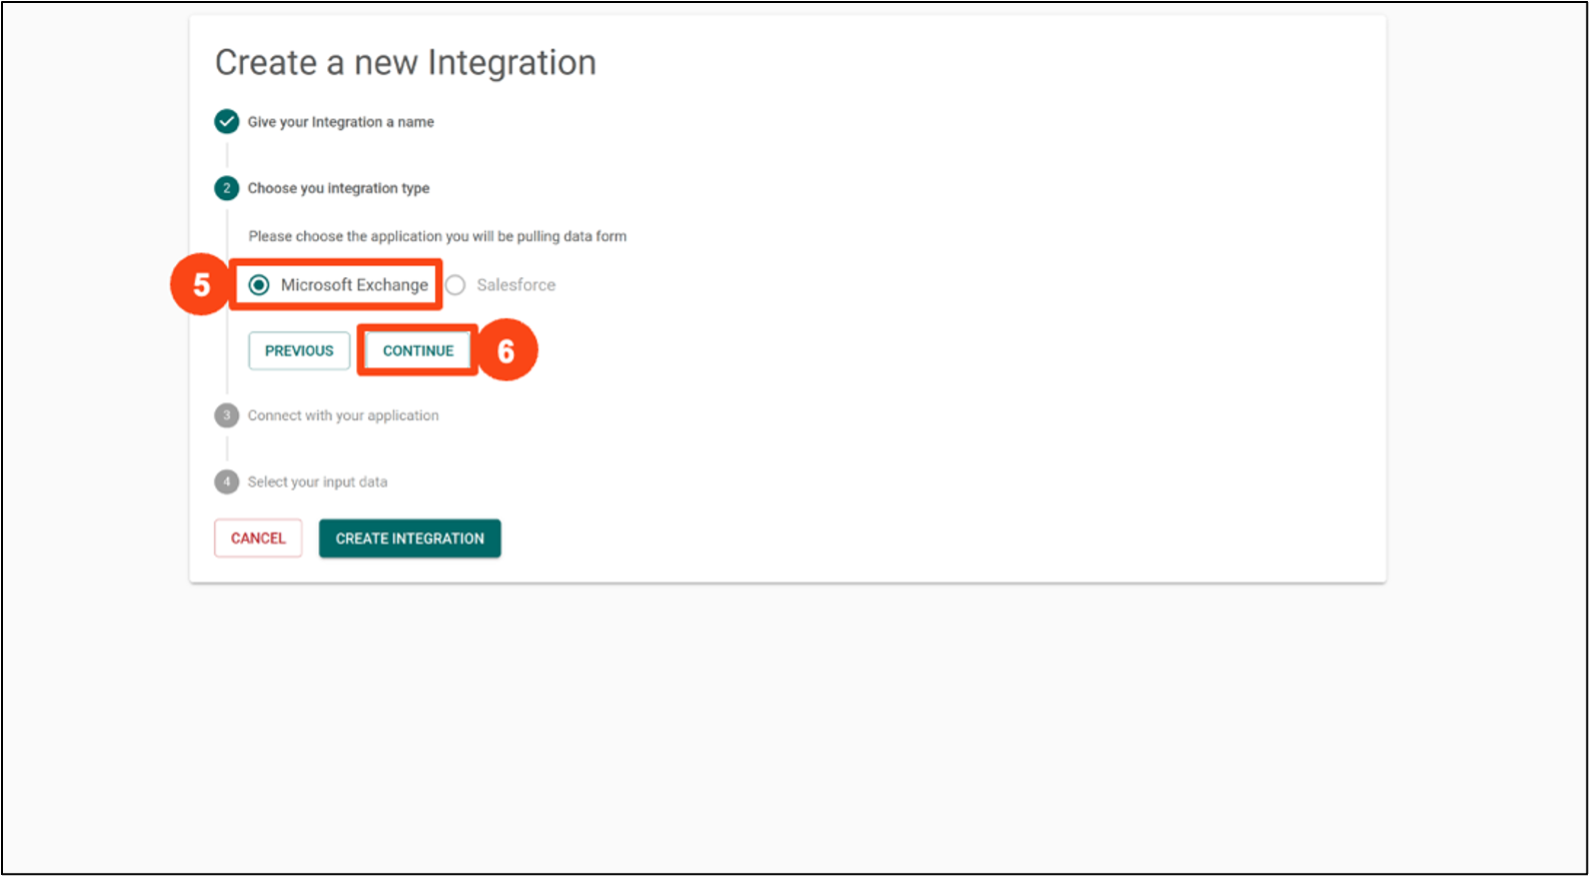
- Ensure Microsoft Exchange is selected when choosing your integration type
- Click Continue
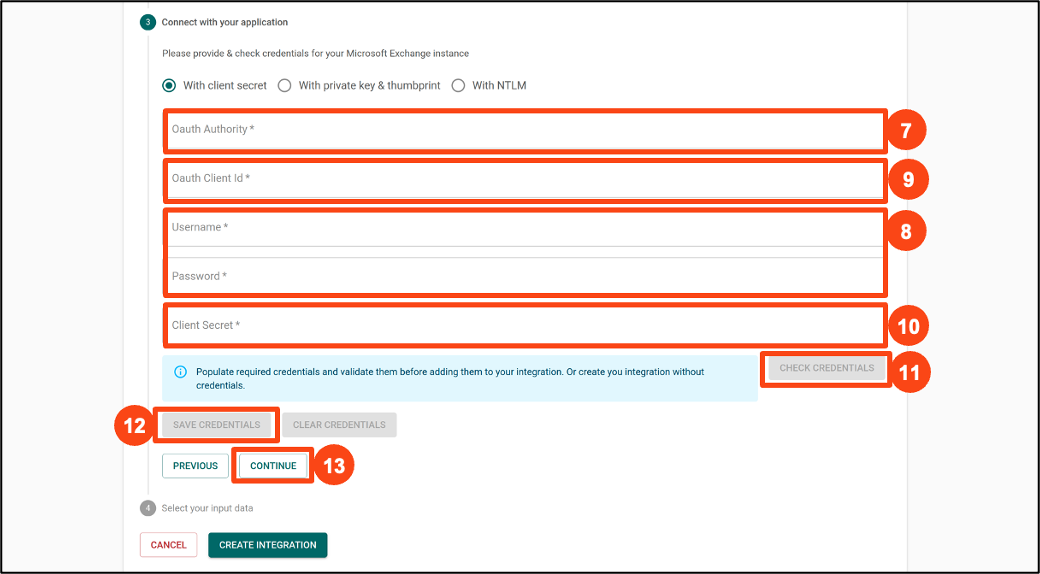
- Populate your oauth authority using the tenant ID generated in Step 2, in the
following format:
https://login.microsoftonline.com/{tenant_id} - Populate username and password of your service account
- Populate your client ID generated in Step 2
- Populate your Client Secret generated in Step 3
- Click Check Credentials to check that your credentials are valid
- Click Save Integration
- Click Continue
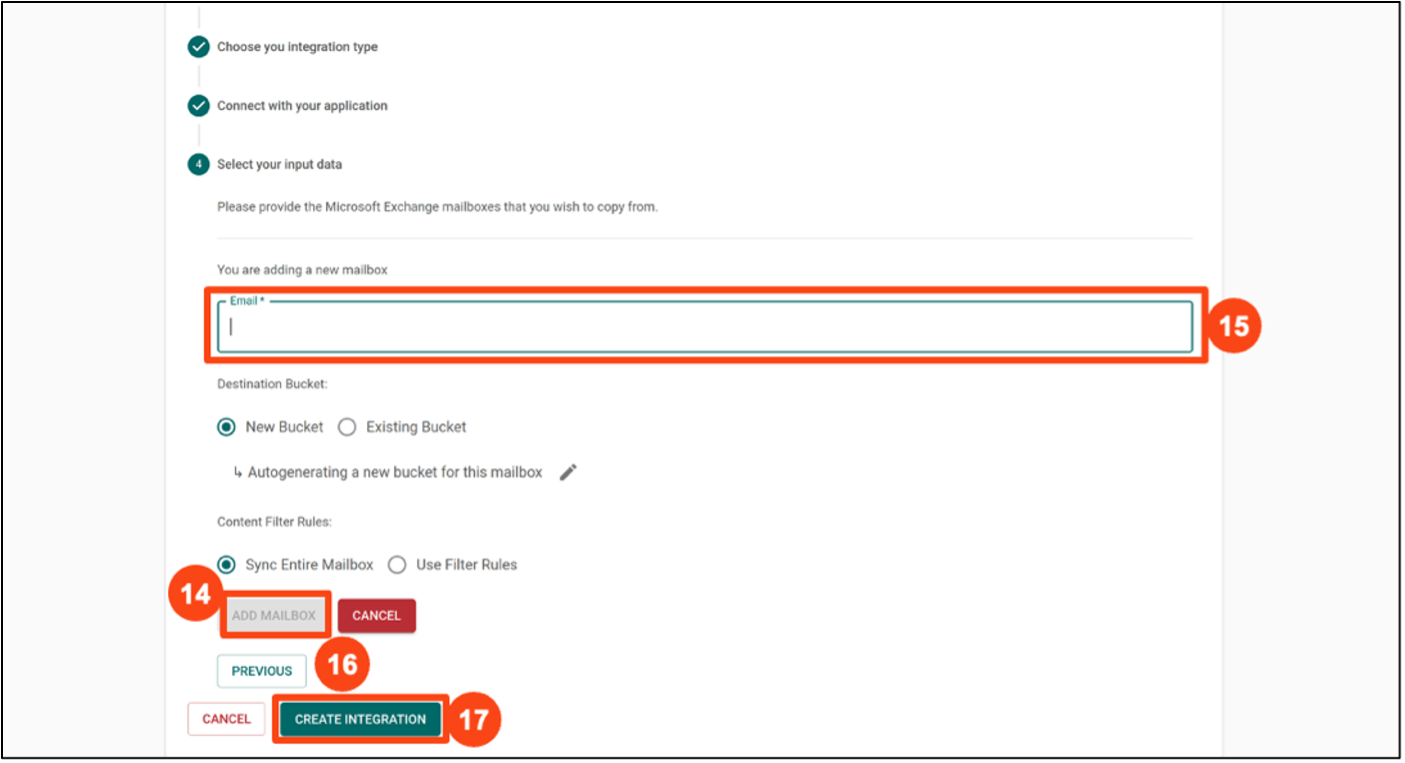
- Click Add Mailbox to open the mailbox form
- Enter the email address for which you wish to copy emails into Communications Mining
- Click Add Mailbox again to save the mailbox
- Click Create Integration
Final Steps
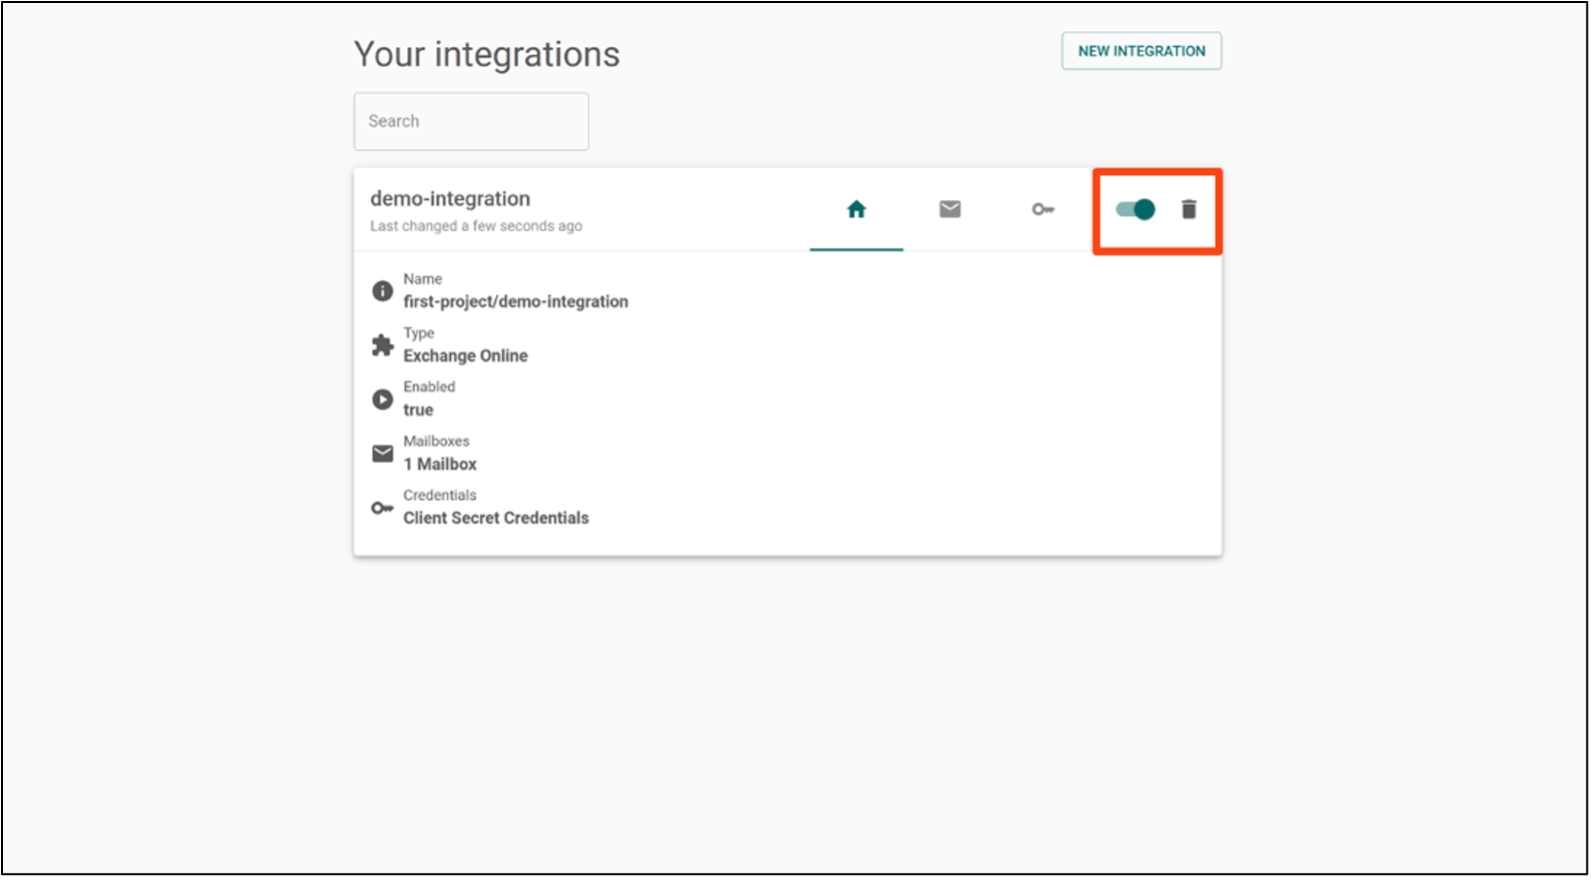
You have now successfully created an integration between Re:infer and Microsoft Exchange through Azure. Should you wish, you can disable the integration by hitting the switch in the top-right corner of the Integrations page. To delete it, select the trash can icon.
If you have any questions or need assistance with the integration process, please contact UiPath support.