Salesforce Integration
You will be charged 1 AI unit per created comment, or per updated comment (based on its unique ID) if its text was modified.
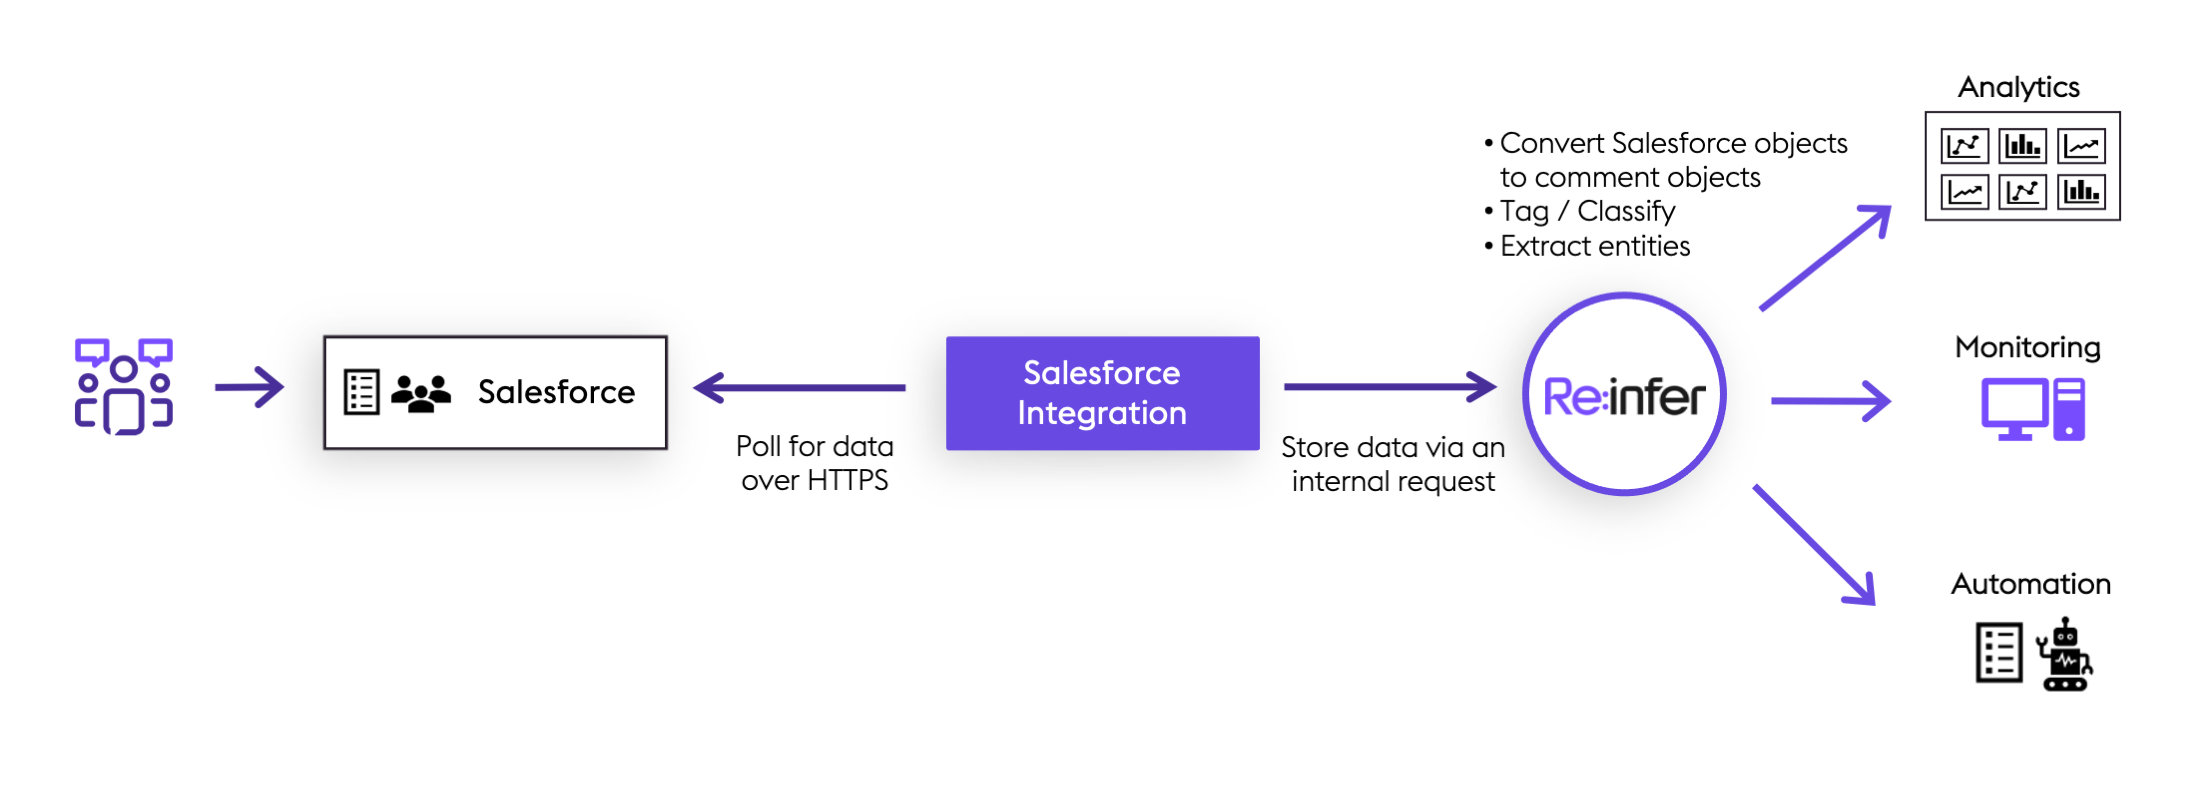
The Re:infer Salesforce Integration provides a convenient and easy-to-setup way to sync your Salesforce communications data into Re:infer in real time. The integration is capable of syncing emails and other communications data.
Overview
The Salesforce Integration is a managed pipeline running on the Re:infer cloud that can be configured to extract pieces of communications data from Salesforce objects without any development needed.
Once the integration is configured it will continuously poll for the configured objects and fields in Salesforce, clean them, enrich them with object metadata and convert them to Re:infer comment objects. The Re:infer comments will be available on the web interface and from the API to any user with the right access.
Access to Salesforce data via the Salesforce Integration is managed through Salesforce Connected Apps and authenticated with OAuth2, giving you full control of when and how much you give Re:infer access to your data.
Creating a Connected App
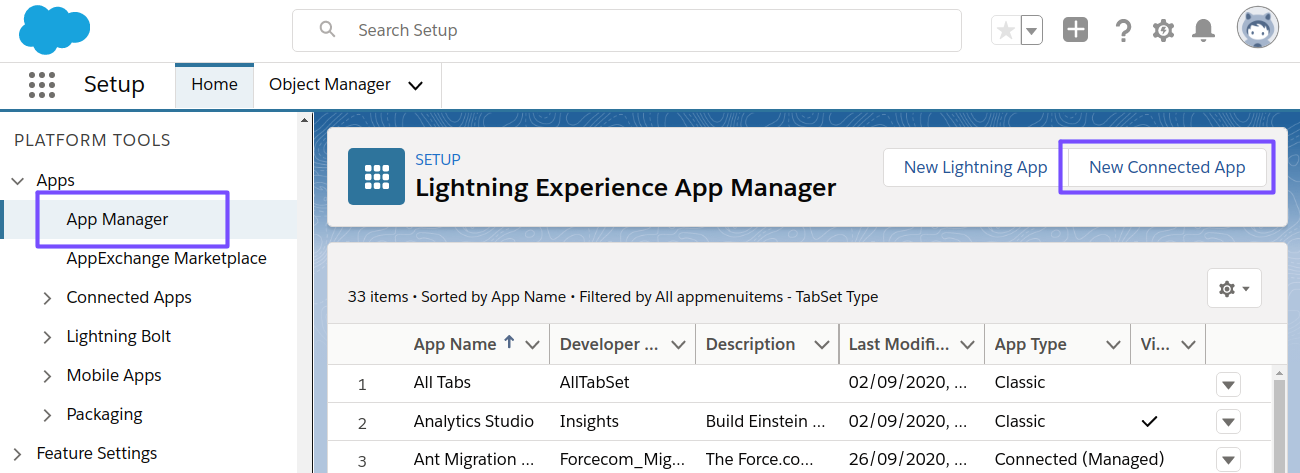
In order to provide Re:infer access to your Salesforce instance, a Salesforce administrator will need to create a Connected App.
It's worth familiarising yourself with the concepts of Connected Apps in the above link, but to set up the Re:infer Salesforce Integration the following steps should be sufficient. These steps should be completed using the same account that the Connected App will be authenticated with.
Any Salesforce user with the right access to the data you'd provide to Re:infer can be used to authenticate the integration. In general, it's recommended to use a dedicated integration user for this so that the Salesforce Integration is not tied to a specific person's account. You can read more about Salesforce's recommendations on the matter here.
- In your Salesforce Setup, under Apps, select App Manager and click on New Connected App.
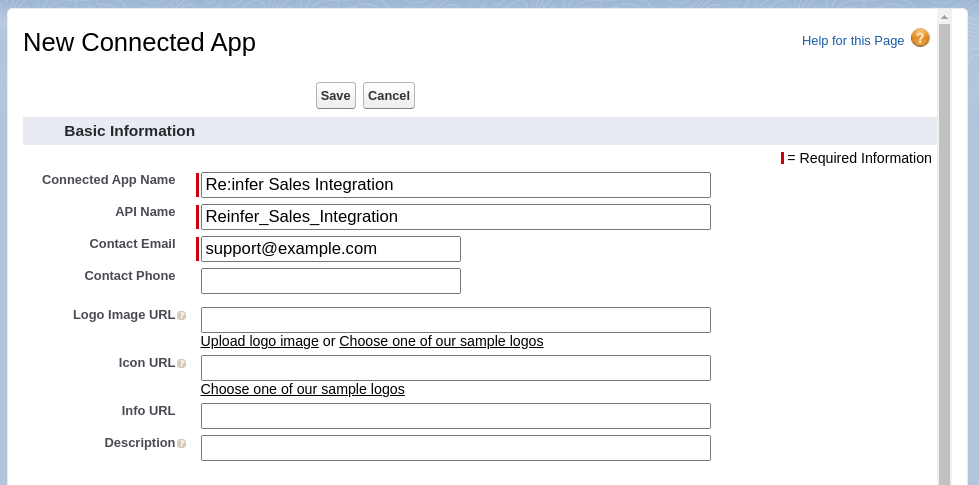
- Follow the guidance from Salesforce and fill in the required information, such as App Name, API Name and Contact Email. The following is an example:
Select the checkbox Enable OAuth2 Settings, this will open up a new section of options.
Under Callback URL, insert the following line, replacing
<mydomain>with your tenant domain:https://<mydomain>.reinfer.io/external/salesforce/oauth2/callback.The following scopes are required for the Salesforce Integration to work. Add them to Selected OAuth2 Scopes.
| OAuth2 Scopes |
|---|
| Manage user data via APIs (api) |
| Perform requests on your behalf at any time (refresh_token, offline_access) |
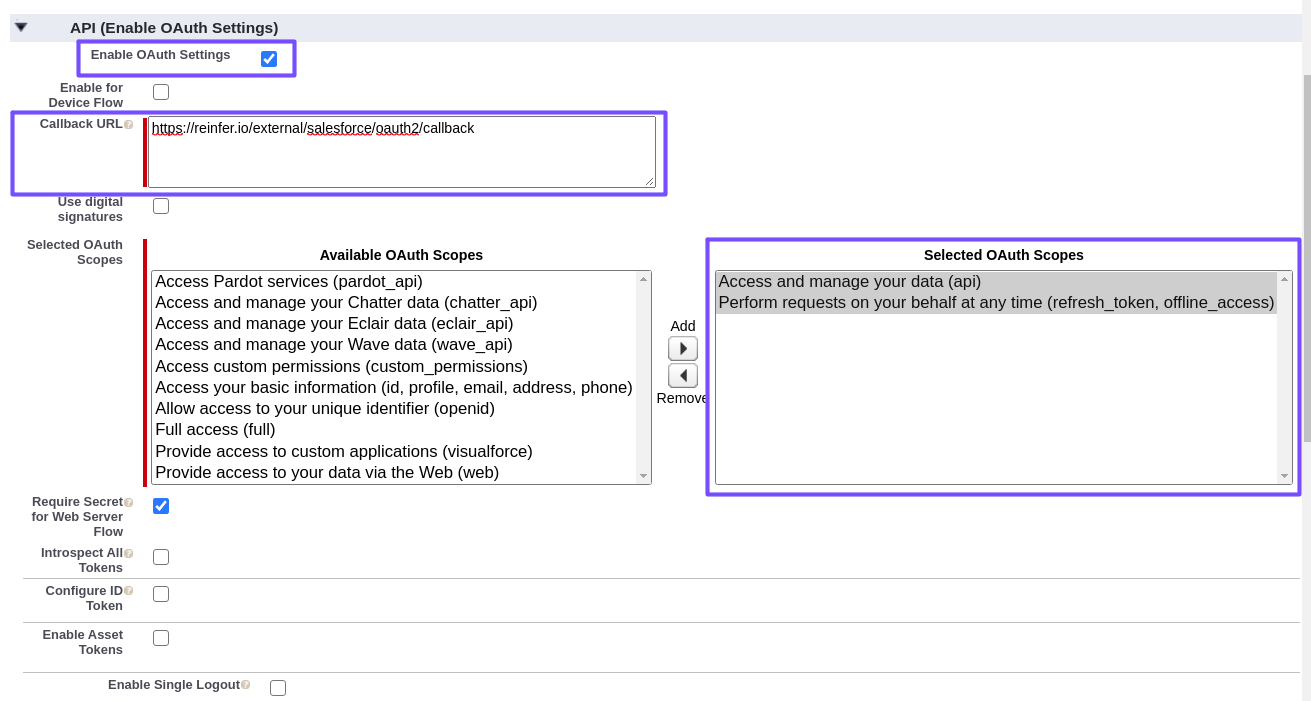
You do not need to change any of the other settings. Click Save at the bottom of the page to create the Connected App.
Take note of the Consumer Key and Consumer Secret of the Connected App you just created. You will need to send them to us to set up the integration.

Salesforce Integration
Setup
The Salesforce Integration will be set up by a Re:infer engineer using the information you provide.
Once you created the Connected App, please contact support with the following details.
Connection Details
| Name | Description |
|---|---|
| Consumer Key | A long string of letters and numbers, found on the page for the Connected App |
| Consumer Secret | A long string of letters and numbers, found on the page for the Connected App |
| Instance URL | Your Salesforce instance URL, e.g. um6.salesforce.com, see Salesforce documentation for how to find it |
Salesforce Objects
The Salesforce Integration can be configured to poll for any of your standard or custom Salesforce objects. For each object you would like to sync into Re:infer, please provide the Salesforce API names of the objects and its fields.
Permissions
Please ensure that the user used to authenticate the integration has "Read" and "View All" access to the objects and "Read" access to the fields you would like to sync into Re:infer.
OAuth2 Authentication
The integration needs to be authenticated to get access to your Salesforce data. This is done through OAuth2 with an authorized Salesforce account. You should authenticate the integration using the same account that was used to set up the Connected App.
- Navigate to the authentication URL that we provided. It will look like this:
https://<mydomain>.reinfer.io/integrations/<project-name>/<integration-name>/oauth2/authenticate
where <mydomain> is your tenant domain, and
<project-name>/<integration-name> are the project and name of your Salesforce
Integration.
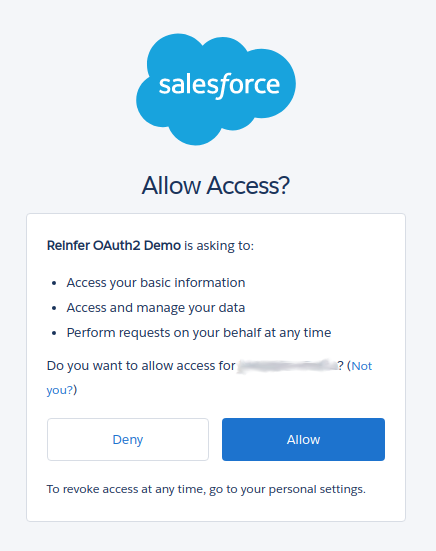
- You will be automatically redirected to a Salesforce login page. Log in with the Salesforce account that will provide access to the integration. The browser will redirect to a confirmation page.
- On the confirmation page, approve the requested permissions.
- Once done, you should be redirected back to
https://<my_tenant>.reinfer.iowith a notification indicating the integration was configured successfully.